Basement Shower Options: Prefab vs. Tile for Small Basement Bathrooms
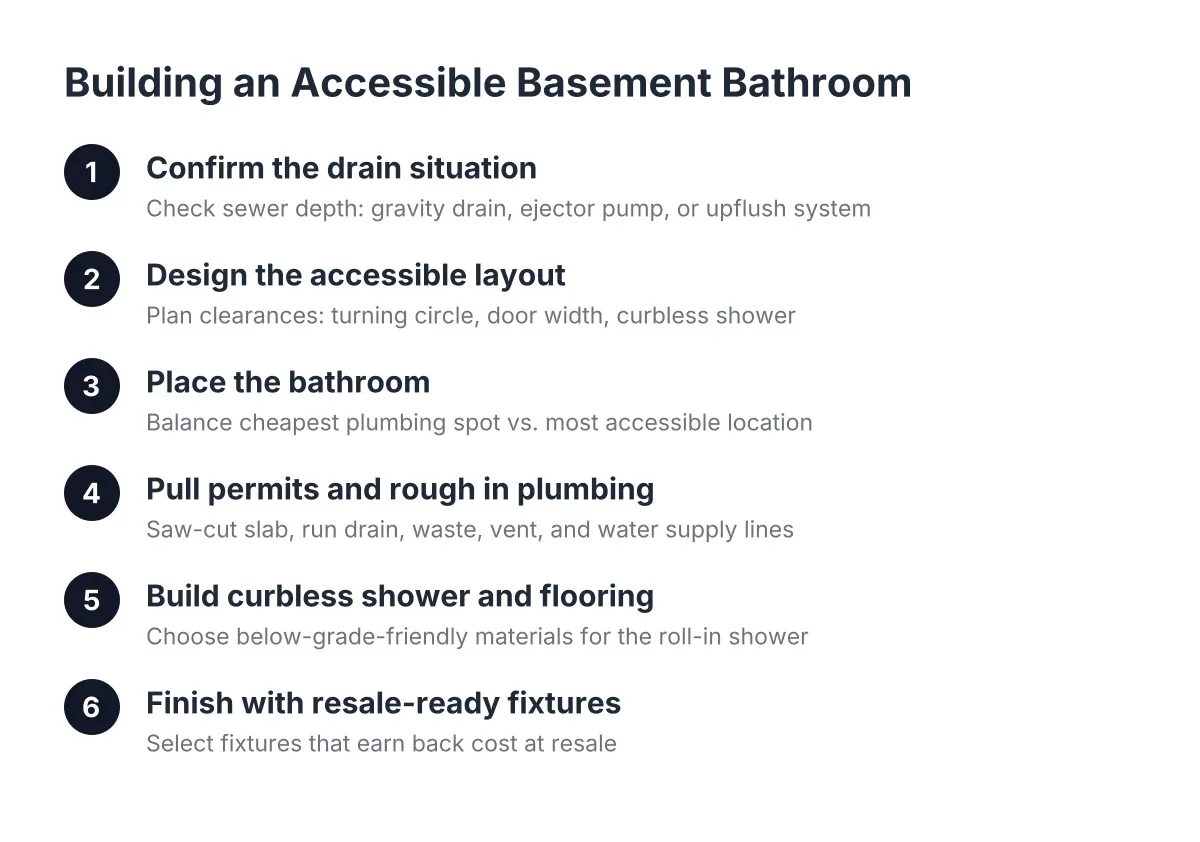
Adding a basement shower comes down to two big choices: what the shower sits on, and how the water leaves the building. Below grade, the drain question shapes everything else, including whether a prefab shower stall or a tiled shower makes sense for your space. This guide walks through the decision step by step, with straight answers on the plumbing tradeoffs, gravity drain versus ejector pump, that make basement bathrooms different from any other bathroom in the house.
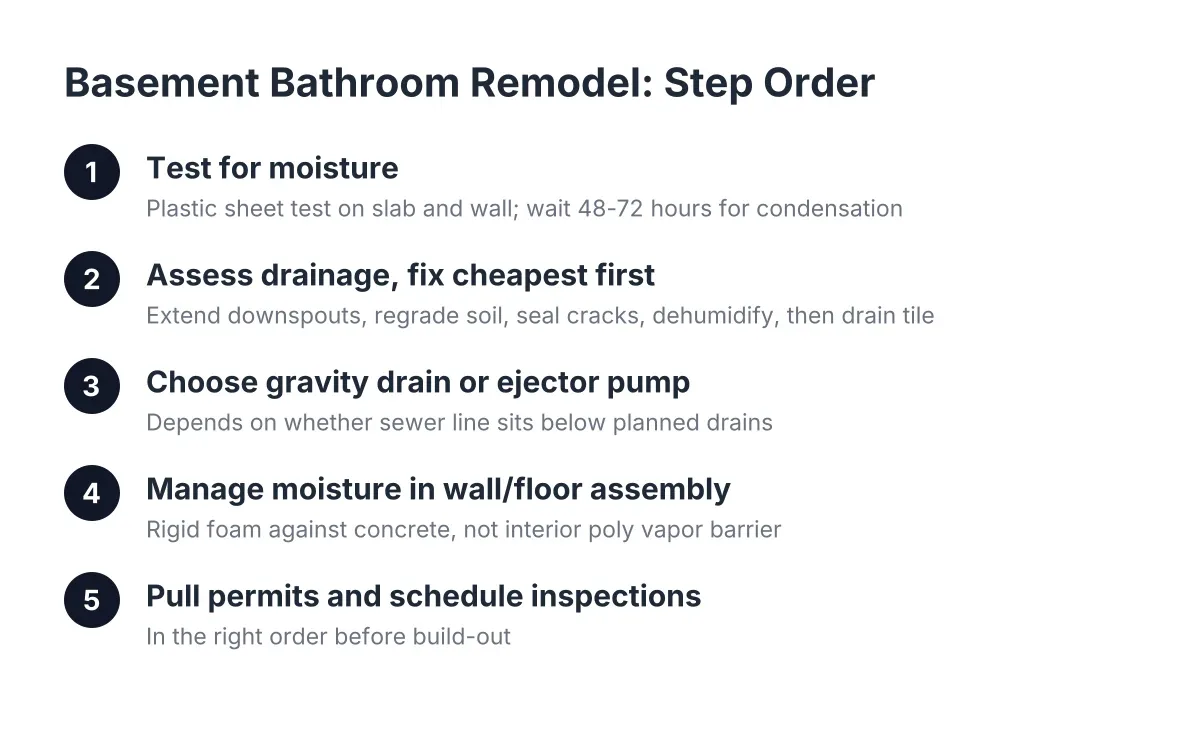
If your basement has a history of dampness, you are right to be skeptical. A shower adds water to a space that may already struggle with moisture. The good news is that the sequence below deals with that problem first, before any pan or tile goes in.
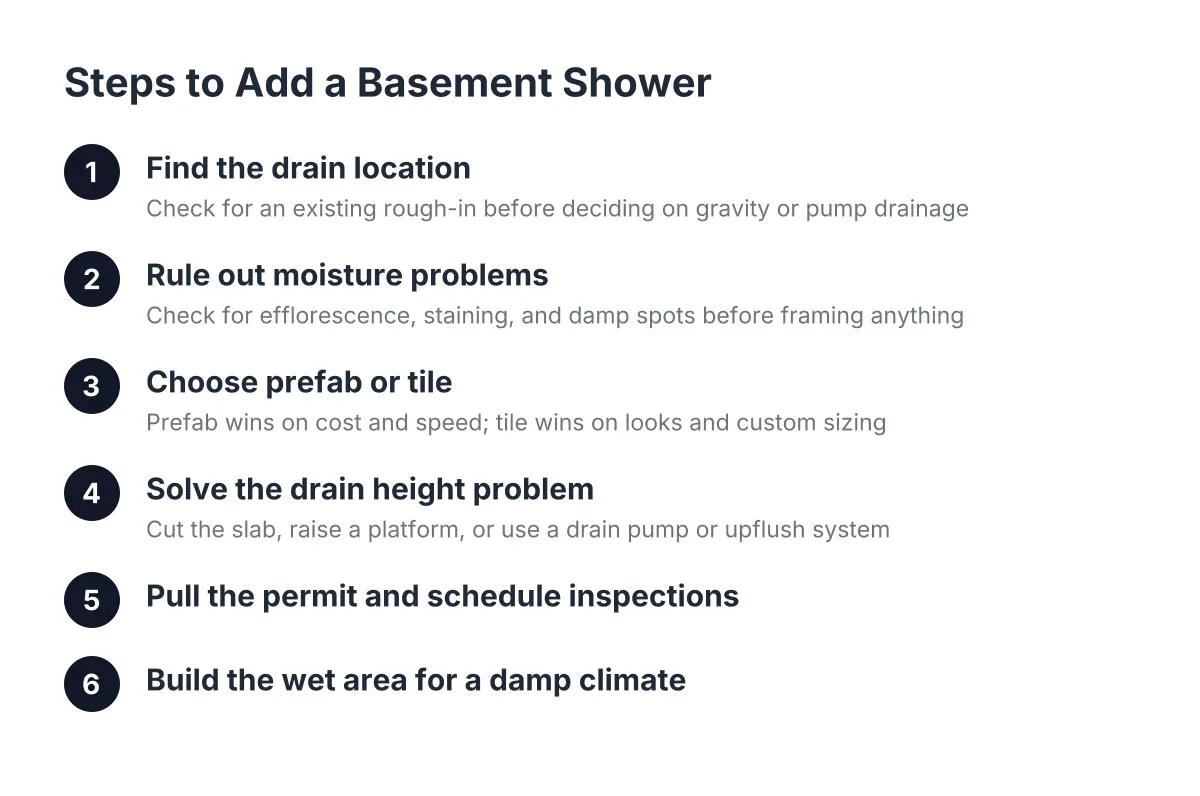
Step 1: Find Out Where Your Drain Is (or Isn't)
Start at the floor, not at the showroom. Many Minneapolis homes built after the 1970s have a bathroom rough-in already stubbed into the slab, usually a capped toilet flange and a covered drain nearby. If you have one, a gravity drain may already be waiting for you, and your basement shower gets a lot cheaper.
No rough-in? Then you have two paths:
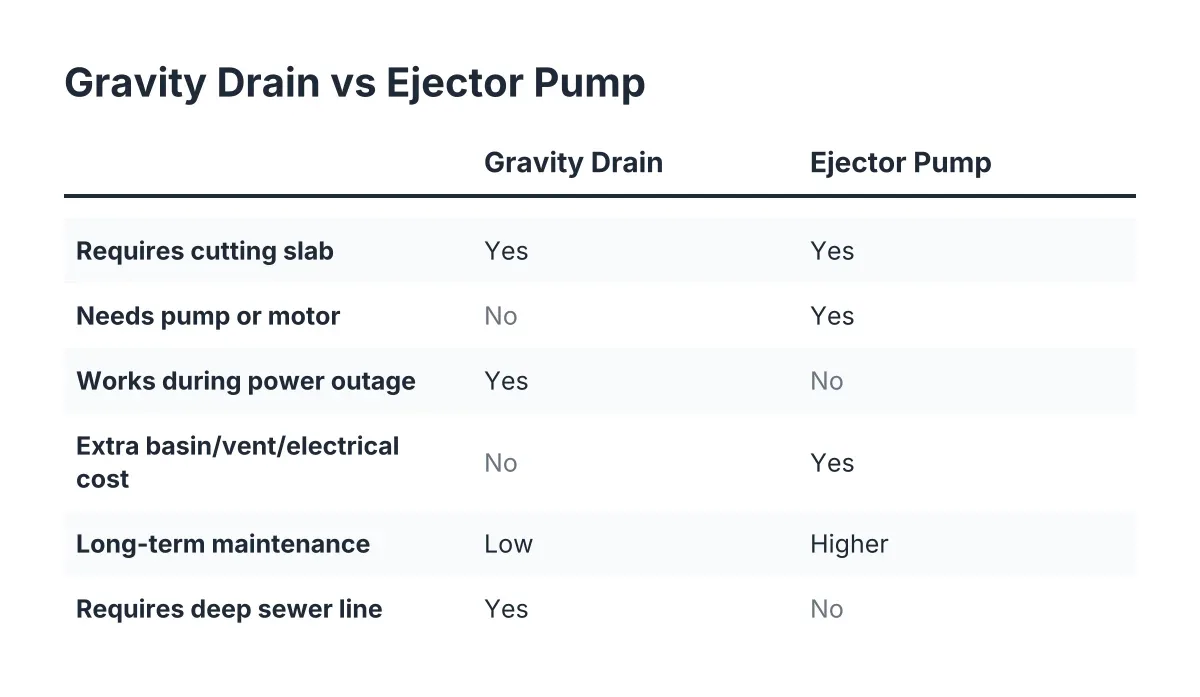
- Break the slab and tie into the main drain by gravity. This works only if the main sewer line sits deep enough below the slab to give the shower drain proper fall. A plumber confirms this with a quick check of the main line depth.
- Pump the water up. A sewage ejector pump in a sealed basin, or an upflush system such as a Saniflo toilet paired with a shower drain pump, lifts wastewater to the overhead drain line. This avoids major slab work but adds a mechanical part that needs power and occasional service.
The tradeoff is simple. Gravity costs more up front in concrete cutting but has no moving parts. A pump costs less to install in many cases but runs for the life of the bathroom. For a rental unit, a gravity drain is usually the lower-maintenance choice; a landlord does not want a tenant calling about a tripped pump at midnight.
Step 2: Rule Out Moisture Problems Before Anything Gets Framed
Do not skip this step, especially if the basement smells musty every spring. Finishing over an unsolved water problem is how mold shows up in year two. Check the slab and walls after a heavy rain. Look for efflorescence, that white chalky residue on concrete, staining at the base of the walls, or damp spots on the floor.
Minor dampness from humidity can usually be handled with a dehumidifier, proper ventilation, and moisture-tolerant materials. Active water intrusion, water that pools or runs during rain, has to be fixed at the source first. That may mean grading, gutters, or drain tile work, and sometimes a separate waterproofing company handles it before a finishing crew starts. A straightforward contractor will tell you which situation you have instead of selling you both.
However, even a dry-looking slab can pass ground moisture upward. A vapor barrier under the slab is designed to block moisture transmission from the ground into the concrete, according to W. R. Meadows, but many older Minneapolis homes were poured without one. That reality should push your material choices toward waterproof, not just water-resistant.
Step 3: Choose Prefab or Tile for the Basement Shower
For most small basement bathrooms, a prefab shower stall wins on cost, speed, and moisture resilience; a tiled shower wins on looks and custom sizing. Prefab units are one-piece or multi-piece acrylic or fiberglass with a factory-formed pan, so there are fewer joints where water can find its way behind the wall. Tile offers any size and any style, but it depends entirely on the waterproofing layer behind it.
Here is how the two compare below grade:
- Prefab basement shower kit: Lower installed cost, one or two days of labor, integrated shower pan, and easy cleaning. Downsides are standard sizes only (often 32, 36, or 48 inches), a plastic look, and the fact that multi-piece units must fit down your basement stairs. Measure the stairwell before you order a one-piece unit; many will not make the turn.
- Tiled shower: Custom footprint, better resale presentation, and no stairwell problem since materials come down in pieces. Downsides are higher cost, more labor days, and grout joints that need a proper waterproofing membrane behind them. In a basement with any moisture history, a failed tile pan is a slow leak into concrete you cannot see.
For a small residential landlord finishing a duplex basement, prefab is usually the right call. It is durable, tenants cannot crack grout, and turnover cleaning is fast. For an owner-occupied basement where resale finish matters, tile can be worth the added cost. Basement finishing overall recovers about 64% of its cost at sale, according to the National Association of Realtors, so spend the tile budget where buyers will notice it.
Step 4: Solve the Basement Shower Drain Height Problem
Every basement shower has to get its drain below the pan, and the slab is in the way. You have three options, and this is where the gravity versus pump decision from Step 1 comes home:
- Cut the slab for a flush gravity drain. The crew saws and chips a trench, sets the trap and drain line with proper slope, and pours new concrete. One useful trick during the pour: keep a small form around the drain stub so the pipe position can still be adjusted when the shower pan goes in. Concrete is unforgiving, and a drain that is off by an inch means a pan that will not seat.
- Raise the shower on a platform. A step-up base of 4 to 8 inches creates room for the trap above the slab, draining by gravity to an existing rough-in or to a pump basin. This avoids slab cutting but eats headroom, and Minneapolis code sets minimum ceiling heights over fixtures. Measure before you commit.
- Use a drain pump or upflush system. A basement shower with a pump keeps the pan near floor level and sends graywater up to the main line. It is the least invasive option, but the pump needs an accessible location for service and a dedicated circuit.
Each option is legitimate. The wrong move is guessing at the main line depth and finding out mid-project that gravity will not work.
Step 5: Pull the Permit and Schedule Inspections
Basement bathroom remodeling in Minneapolis requires plumbing and building permits, and as of 2026 the city inspects the rough-in before anything gets covered. This is not red tape to dodge. The rough-in inspection catches slope errors, missing vents, and trap problems while they are still cheap to fix. An unpermitted basement bathroom also becomes a liability at sale or, for a landlord, at a rental license inspection.
Ventilation gets inspected too. Every basement shower needs an exhaust fan ducted to the outside, not into a joist bay. In a below-grade room, that fan is your main defense against the humidity that feeds mold.
Step 6: Build the Wet Area for a Damp Climate
Material choices matter more in a basement than in an upstairs bath. Therefore, pick products that shrug off humidity:
- Cement board or a foam backer board behind tile, never standard drywall in the wet zone.
- A waterproofing membrane over the entire tiled shower area, walls and pan.
- Moisture-resistant drywall and paint for the rest of the room.
- Luxury vinyl plank or tile flooring outside the shower, not carpet or hardwood.
If the bathroom sits within a larger basement finishing project, a subfloor system under the finished flooring adds cheap insurance. Even a slab with a vapor barrier can see a future moisture event, and a subfloor keeps finished flooring off the concrete.
Step 7: Sanity-Check the Budget Against the Whole Project
Suppose a landlord owns a 1960s duplex with an unfinished basement and wants a three-quarter bath to support a legal bedroom conversion. With an existing rough-in, a prefab basement shower stall, and modest fixtures, that is a small project measured in a few thousand dollars of labor and materials. Without a rough-in, add slab cutting or an ejector pump and basin, and the plumbing alone can rival the cost of the finishes. That gap is why Step 1 comes first.
For context, Angi reports an average basement remodel runs $30 to $75 per square foot, and small bathroom remodeling costs concentrate in plumbing and waterproofing rather than fixtures. When you compare bids from bathroom remodeling contractors near you, make sure each bid states the drain strategy. A quote that never mentions gravity, pump, or slab work is a quote that has not thought about your basement.
One honest limitation: if your basement floods rather than dampens, or your main sewer line is shallow, a licensed plumber needs to evaluate the site before you spend anything on design. Some basements need drainage work first, and a good contractor will say so at the estimate, not after demo.
If you need basement finishing, Minneapolis Basement Finishing Pros can help.
Prefer to talk it through? Call (651) 758-8806 — a quick call is usually the fastest way to get a straight answer for your situation.