Basement Renovation Ideas Start With Layout: 8 Planning Steps Before You Build
Most homeowners collect basement renovation ideas from Pinterest boards and before-and-after photos, then call a contractor and ask for a price. That order is backwards. In an unfinished Minneapolis basement, the layout you choose, where the bedroom goes, where the bathroom drains, how you handle the stairs, sets most of your budget before anyone picks up a hammer. Plan the layout first and you avoid the two things that hurt most: paying for a remodel that fails inspection, and paying twice because you changed your mind mid-project.
This guide walks through eight planning steps in the order a contractor would actually think about them. Each one shapes cost, code compliance, or both. If you are the type who worries about permits and inspections, that worry is healthy. The planning stage is exactly where you address it.
1. Walk the Unfinished Space and Map What Cannot Move
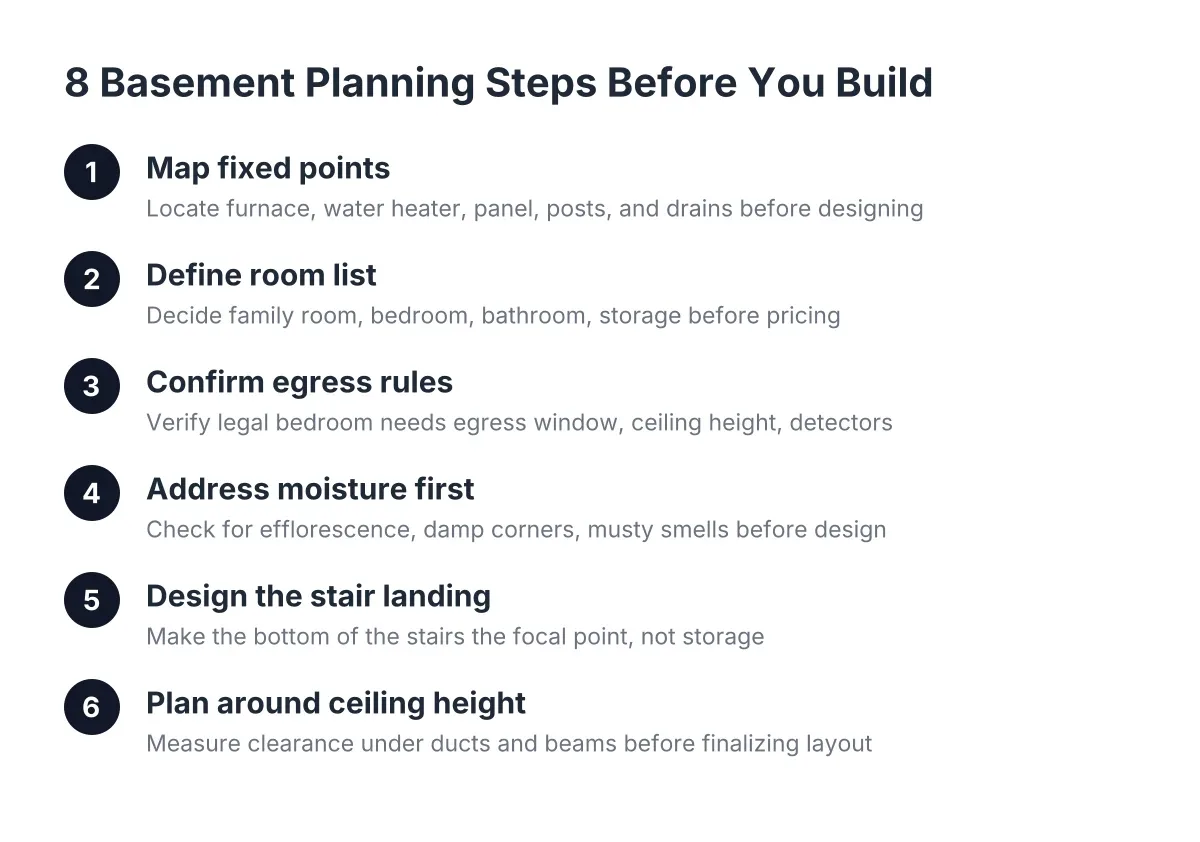
Before you sketch a single wall, find the fixed points: the furnace and water heater, the main drain line, the electrical panel, support posts, and any floor drains. These items either cannot move or cost real money to relocate, so your basement layout has to work around them.
For example, the mechanical area needs code-required clearance and access, which means it usually becomes an enclosed utility room. The main sewer stack tells you where a basement bathroom is cheapest to build. Support posts can be boxed in, hidden inside a wall, or turned into a design feature, but they are staying. Map these first and half your layout decisions make themselves.
2. Decide What the Rooms Are Before You Price Anything
A finished basement is not one project; it is a set of rooms, and each room type carries different code requirements and costs. A family room needs framing, insulation, drywall, flooring, and outlets. Additionally, a legal bedroom adds an egress requirement. Furthermore, a bathroom adds plumbing, venting, and its own inspections.
Therefore, write down the actual list: say, one family room, one bedroom, one bathroom, and a storage or utility room. That list is what a contractor prices, and it is what the city permits. It also lets you phase the work honestly. Many first-time finishers frame and floor the main space in year one and add the basement bathroom later, which works fine if the rough plumbing is planned now.
3. Confirm What a Legal Bedroom Actually Requires
If your plan includes a bedroom, this is the step that decides whether the room counts at appraisal and resale or gets flagged in a future inspection. In broad terms, a legal basement bedroom needs a code-compliant emergency escape and rescue opening, which usually means an egress window, plus minimum ceiling height, smoke and carbon monoxide detection, and permitted electrical work.
Suppose a homeowner sets up a teenager's room downstairs with a bed, a closet, and a small existing window, then lists the house three years later. A pre-listing inspection flags the room as a non-conforming bedroom, and the appraisal drops because the house counts one fewer bedroom than the listing claimed. That scenario is common, and it is entirely avoidable at the planning stage. Egress requirements have specific dimensional rules that vary by situation, so have a contractor or the Minneapolis inspections office confirm what your window opening needs before you finalize the layout. This is one area where guessing is expensive.
4. Deal With Moisture Before You Deal With Design
No basement renovation idea survives a wet floor. Minneapolis basements deal with spring melt, clay soils, and decades-old foundations, so check for moisture before you commit to a design. Look for efflorescence (white mineral staining) on the walls, damp corners after heavy rain, and musty smells near the slab.
If you find problems, basement waterproofing, grading fixes, or a drain tile system come first, not after the drywall goes up. Even in a dry basement, plan the wall assembly for moisture: rigid foam against the concrete rather than fiberglass batts stuffed directly against the wall. In addition, if a previous owner already framed walls with insulation packed against the concrete, it is often smarter to tear that assembly out and start clean than to build over an unknown.
5. Treat the Bottom of the Stairs as the Front Door of the Basement
Here is a layout mistake that shows up constantly: the space at the bottom of the stairs gets left as unfinished storage, and only the area off to one side gets finished. The result is that everyone who comes downstairs walks through the worst part of the basement first.
Instead, design the stair landing as the focal point. Put the open family room, a built-in, or a feature wall where the eye lands when you reach the bottom step. Push storage and mechanicals to the far corners where nobody needs to see them. Carrying a design element, such as paneling or paint color, from the basement up the staircase also previews the finished space before anyone reaches the bottom. This costs nothing extra at the planning stage and changes how the whole basement feels.
6. Basement Renovation Ideas That Work With Real Ceiling Height and Obstacles
Low ceilings kill more basement plans than budgets do. Measure your actual height, including under ducts and beams, before you fall in love with a design. A basement with 7 feet under the ductwork calls for different renovation ideas than one with 8-foot clearance: think drywalled soffits that follow the ducts, recessed lighting instead of fixtures that hang down, and layouts that keep tall furniture out of the low zones.
However, do not assume a low ceiling means a cheap-looking basement. Painting exposed joists in one zone, running trim consistently, and choosing low-profile flooring all work with the height you have. What you want to avoid is a plan drawn for a ceiling you do not own, then a mid-project scramble when the ductwork will not hide.
7. Choose Flooring for Concrete and Moisture, Not for the Catalog Photo
Basement flooring sits on a concrete slab that can transmit ground moisture, so the right product list is shorter than the one upstairs. Luxury vinyl plank handles moisture well and has become the default for Minneapolis basements. Carpet with the right pad works in bedrooms and media areas. Solid hardwood is the wrong call on a slab.
As a result, flooring is one of the clearer cheap-versus-quality decisions in the whole project. The cheapest option that ignores moisture can buckle or grow mildew and get replaced in five years; a mid-grade product installed over a proper underlayment lasts. The same logic applies to walls: some homeowners look at basement wall panels as a fast finish, while others prefer a framed and drywalled wall that looks like the rest of the house. Both can work; the trade-off is upfront cost versus a standard residential look.
8. Put Numbers to the Plan Before You Commit
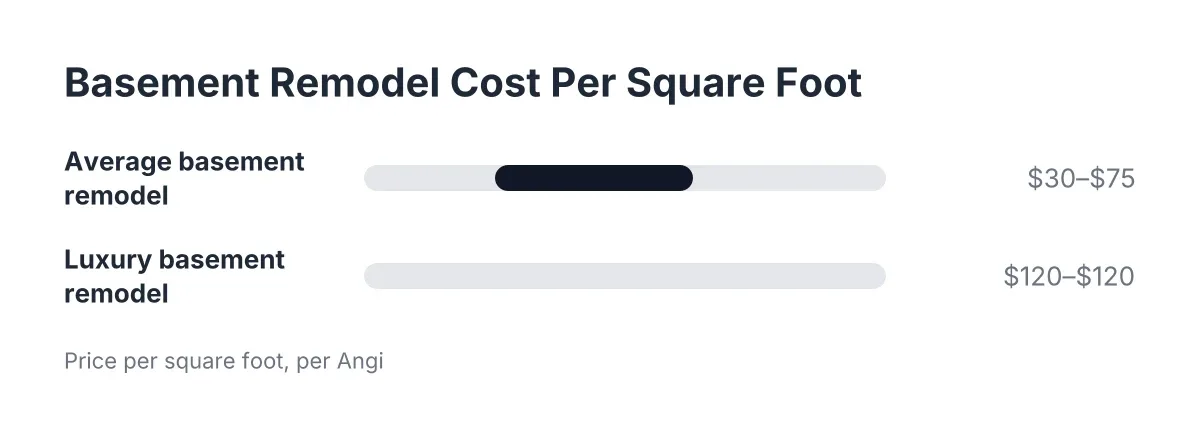
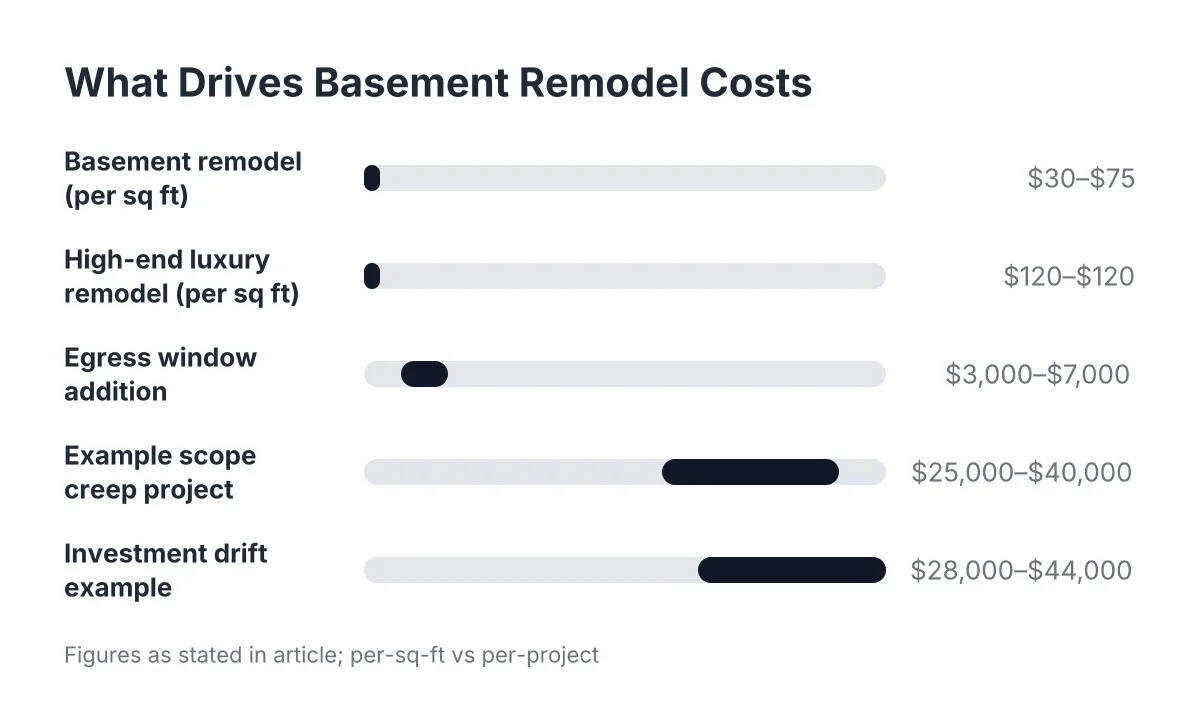
Once the layout is set, the budget becomes far less mysterious. An average basement remodel runs between $30 and $75 per square foot, according to Angi, and where you land in that range depends mostly on decisions made in steps 2 through 7: whether there is a bathroom, whether egress work is needed, and the finish level you choose. A finishing basement cost calculator can give you a rough starting point, but a line-item estimate against your actual layout is what protects you from sticker shock.
Plan the permit path at the same time. Finished basements in Minneapolis require permits, and the work gets inspected in stages, typically an electrical rough-in inspection early on and an insulation inspection later, before drywall closes everything up. Those inspections protect you; they are the paper trail that proves the basement is legal when you sell. Budget honestly for the parts homeowners underestimate, too. Trim work is the big one; baseboard, casing, and paneling in a basement often add up to far more linear feet than any room upstairs.
On resale, keep expectations grounded. The National Association of Realtors found that 64% of basement finishing costs are recovered at sale, among the highest of 20 home improvement projects studied, and homeowners rated the project a 9.5 out of 10 joy score in the same report. In other words, a finished basement pays you back partly in dollars and mostly in living space. If material prices are spiking when you get your bids, waiting a season for prices to settle can be the smarter financial move than starting mid-spike.
How Layout Planning Keeps Basement Remodeling Costs Predictable
Every step above exists to answer one question: what will this actually cost, with no surprises at inspection time? A clear layout turns basement remodeling cost from a scary unknown into a list of line items you can compare across bids. It also gives three contractors the same plan to price, which is the only way quotes are truly comparable.
Here is the short version of the planning order:
- Map the fixed points: mechanicals, drains, panel, and posts.
- Name the rooms and decide what gets built now versus later.
- Confirm egress and code requirements for any bedroom.
- Resolve moisture and waterproofing questions first.
- Design the stair landing as the featured entry, not storage.
- Fit the design to your real ceiling height.
- Pick flooring and wall assemblies rated for a slab.
- Get line-item pricing and a permit plan against the finished layout.
The best basement renovation ideas are the ones that survive an inspector's visit and a future buyer's walkthrough. A weekend of planning, and a straight conversation with a local contractor who knows Minneapolis basements, is what gets you there. For anything involving structural changes, cutting the foundation for an egress window, or moving drain lines, bring in a licensed professional before finalizing the plan; those are not areas to solve from a sketch.
If you need basement finishing, Minneapolis Basement Finishing Pros can help.
Prefer to talk it through? Call (651) 758-8806 — a quick call is usually the fastest way to get a straight answer for your situation.