Basement Drywall Installation and Moisture: What Minneapolis Basements Need First
Basement drywall installation and moisture control have to be planned together, or the drywall fails. Proper basement drywall moisture control is essential in a Minneapolis basement, where hanging board on the walls is the easy part. The hard part is what sits behind it: concrete that wicks water from the soil, warm indoor air that condenses on cold foundation walls, and wall assemblies that either let moisture dry out or trap it until mold shows up. This guide walks through the whole sequence, from moisture checks to board selection to the small spacing details that decide whether your finished basement holds up for twenty years or starts smelling musty in three.
If you are already worried about inspections, permits, or getting flagged when you sell, that concern is the right instinct. A basement that fails because of hidden moisture is a bigger problem than one that was never finished at all. The good news is that the fixes are known, they are not exotic, and a local contractor who works in Minneapolis basements deals with them on every job.
Why Moisture Decides Everything Before Drywall Goes Up
Drywall itself is simple. It is gypsum wrapped in paper, and paper feeds mold when it stays damp. That is the whole problem in one sentence. Concrete foundation walls in Minnesota stay cold most of the year, and the soil outside them holds water. Moisture moves into the basement two ways, and your wall assembly has to handle both.
First, water vapor moves from the wet soil through the concrete toward the drier indoor air. Concrete is not waterproof. Even a basement that never floods still pushes vapor through its walls and floor year round.
Second, and this one surprises most homeowners, warm indoor air leaks into the wall cavity and condenses on the cold concrete. Air leakage deposits far more moisture inside a wall than vapor slowly passing through materials. That means airtightness behind your drywall matters more than almost any product choice you make. A perfectly sealed, ordinary assembly beats an expensive one full of gaps.
So before anyone talks about which drywall to buy, the real questions are: is the basement dry enough to finish, and will the wall assembly let moisture escape instead of trapping it?
Check for Moisture Problems Before You Insulate or Hang Board
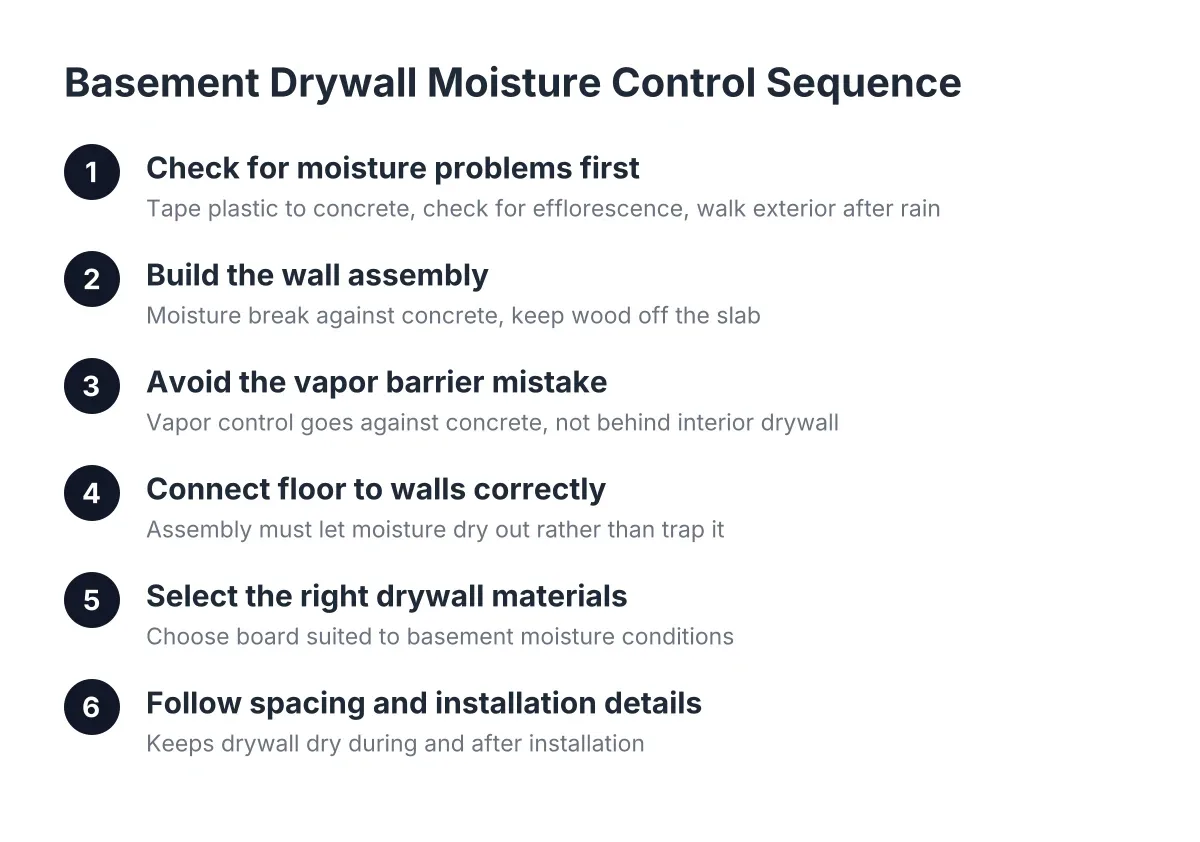
Resolve every drainage and moisture issue before insulation or drywall goes in. Insulating over an unresolved water problem hides it, and hidden water degrades framing fast. This is the one step you cannot skip or rush, because everything after it depends on a dry starting point.
Here is a practical checklist to run through, ideally across a wet spring month, before committing to basement drywall installation where moisture is a known risk:
- Tape a plastic square to the concrete. Tape a two-foot square of plastic sheeting to the foundation wall and the slab, sealed on all edges. Check it after a few days. Condensation on the concrete side means vapor is coming through and your assembly needs to account for it.
- Look for efflorescence. White, chalky staining on the concrete is mineral residue left by water moving through the wall. It tells you where moisture travels.
- Walk the exterior after rain. Gutters dumping at the foundation, downspouts without extensions, and soil sloped toward the house cause most basement water problems. These are cheap fixes compared to interior repairs later.
- Check the slab at the walls. Staining or dampness where the floor meets the wall points to water coming in at the footing.
- Note any past flooding. If the basement has ever taken standing water, plan for drainage, a sump system, or exterior grading work before finishing. Ask your contractor to price that separately so it does not get buried in the remodel.
If you find active leaks, seepage, or standing water, stop and fix the water first. Some situations, like a high water table or a failing foundation drain, call for a waterproofing specialist before a finishing contractor touches the space. That is a limitation worth respecting; no drywall product overcomes water that keeps arriving.
Building the Wall Assembly: Basement Drywall and Moisture Control
A correct basement wall works in two directions at once. It keeps soil moisture in the concrete from wicking into your wood framing, and it keeps warm indoor air from reaching the cold concrete and condensing. Both jobs happen behind the drywall, which is why the order of layers matters more than the drywall itself.
The layer against the concrete
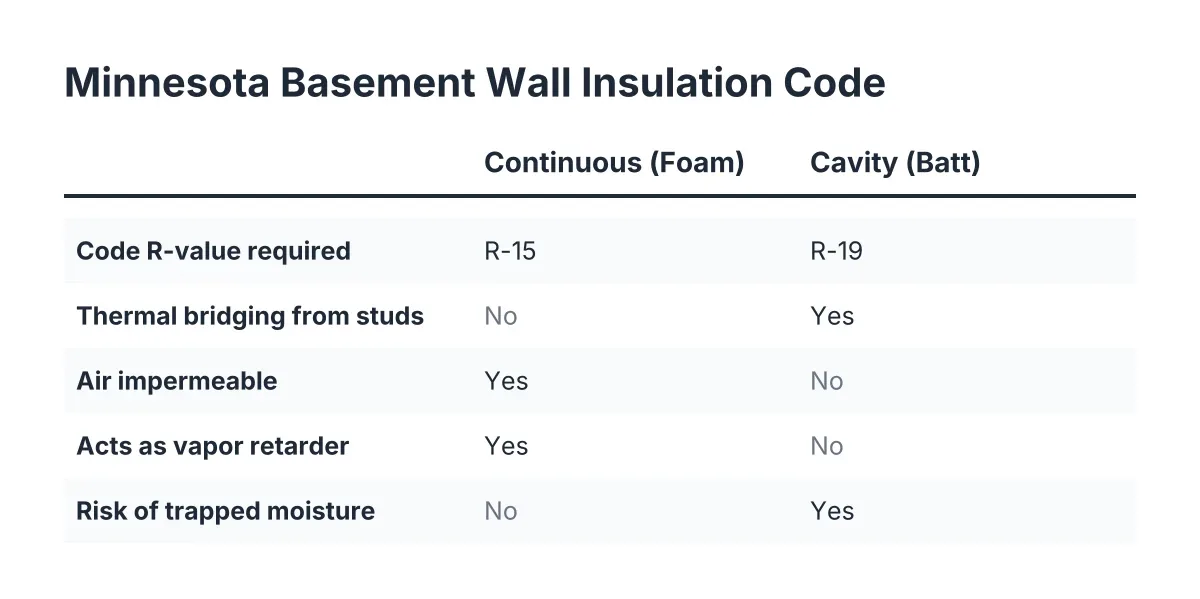
The concrete side needs a moisture break. Rigid foam board insulation is the common approach in Minneapolis basements because foam does not absorb water and it warms the surface that indoor air might touch, which cuts condensation. When rigid foam goes against the foundation, the assembly should stay continuous from the floor up to the joists so any moisture behind it can move and vent rather than pool in one spot.
Keep wood off the concrete. Framing should stand off the foundation wall, and bottom plates on the slab should be pressure-treated or isolated with a sill sealer. Concrete wicks water sideways into anything porous that touches it, and untreated lumber against a slab is how rot starts in an otherwise dry basement.
The vapor barrier mistake that ruins finished basements
Here is the misconception that causes more failed basements than any other. Homeowners assume a sheet of plastic behind the drywall keeps moisture out. In a basement, interior plastic sheeting does the opposite. Moisture enters the wall cavity anyway, through air leaks, through capillary wicking from the concrete, or through a minor leak you never see. With plastic on the interior side, that moisture cannot dry toward the room. It sits in the cavity, and the framing and insulation stay wet.
The working rule: put the vapor control against the concrete, keep the interior finish airtight, and make sure the whole assembly can still dry if it gets wet. Sealing air leaks at the top plate, the rim joist, and every penetration does more to keep the cavity dry than any membrane stapled over the studs. If a contractor proposes stapling poly over the framing before drywall in your basement, ask them to explain the drying path. If they cannot, keep looking.
The floor connects to the walls
Moisture under the floor and moisture behind the walls are the same problem. A dimpled membrane subfloor panel raised slightly off the slab creates an air space underneath, and that space can share air with the gap behind the wall insulation. Vapor migrates to drier zones and escapes instead of accumulating under your basement flooring. If you frame walls on top of a floating subfloor, follow the subfloor manufacturer's guidance so you do not pin the panels down and block that drying path.
Under the slab itself, the vapor barrier that sits over the base course exists to block ground moisture from moving up into the concrete, according to W. R. Meadows. Older Minneapolis homes often have no sub-slab barrier at all, which is one more reason the floor assembly above the slab has to breathe.
Selecting Board: Drywall Materials for Basement Moisture Control
Paperless or mold-resistant gypsum board is the right call for most basement walls, and it is required thinking for any basement bathroom. Standard drywall uses paper facing, and paper is the food source mold needs. Moisture-resistant boards swap the paper for fiberglass facing or treat the core, which gives them far greater resistance to moisture and mildew in basement conditions.
That said, board choice is the second line of defense, not the first. Mold-resistant drywall over a wet, poly-wrapped cavity still fails; it just fails slower. Spend your attention, and your budget, on the assembly and the air sealing first. Then choose board by location:
- Basement bathroom wet walls: cement board or a purpose-made tile backer behind tile, never any gypsum product inside a shower surround.
- Bathroom ceilings and remaining bathroom walls: paperless or mold-resistant board, since a basement bathroom concentrates humidity in a small space.
- General basement walls and ceilings: mold-resistant board is a sensible upgrade for the modest cost difference; standard board can work in a well-built, dry assembly, but the margin for error is smaller.
- Laundry areas and walls near the water heater or sump: treat these like bathroom walls.
Ceilings deserve one note. Basement ceilings hide plumbing, and a pinhole leak upstairs lands on your new drywall. Some homeowners choose a drop ceiling or access panels near shutoff valves and drain cleanouts so a future leak is a repair, not a demolition. Your inspector will also expect access to certain junction boxes and cleanouts, so plan those openings before the board goes up.
Spacing and Installation Details That Keep Drywall Dry
Basement drywall installation succeeds or fails on moisture gaps measured in fractions of an inch. Effective basement drywall moisture control requires attention to small details that separate a careful crew's work from a rushed one that skips them. These are the specifics worth checking on your own job.
Hold the drywall off the slab. Leave a gap of about half an inch to an inch between the bottom edge of the drywall and the concrete floor. Concrete slabs get damp, and gypsum board standing on damp concrete wicks water up the wall like a paper towel. Base trim covers the gap, so nobody ever sees it. This single detail prevents a large share of the moldy-baseboard problems in finished basements.
Keep framing off the foundation wall. The stud wall should stand off the concrete so air and vapor are not trapped between wood and masonry. The insulation layer against the concrete manages that surface; the framing stays on the dry side.
Seal the air paths, not just the surfaces. Gaps at the top plate, around the rim joist, and at every pipe and wire penetration let warm room air reach cold concrete. Foam or caulk those before insulation. Since air leakage moves more moisture than diffusion, this is the highest-value hour on the whole job.
Fasten and finish for humidity swings. Basements run humid in July and dry in January. Screws, not nails, and proper joint taping keep seams from cracking or popping as the assembly moves with the seasons.
Ventilate the finished space. A basement bathroom needs an exhaust fan ducted outside, not into the joist bay. For the rest of the basement, consistent air movement and, in many Minneapolis homes, a dehumidifier in summer keep indoor humidity where drywall and trim stay stable.
While the walls are open, it is also the moment to get the wiring right. In unfinished or damp basement areas, exposed runs of non-metallic cable are not best practice, and running that cable inside EMT conduit is against code in damp or wet locations, according to the National Electrical Code (NFPA 70). Details like that are exactly why the rough-in inspection happens before drywall, and why passing it the first time is a planning issue, not luck.
Where Drywall Fits in the Basement Finishing Sequence
Drywall is roughly the midpoint of a basement finishing project, and everything before it exists so the board never gets wet. Understanding the order helps you spot a contractor who is skipping steps, and it tells you when inspections happen so nothing gets covered up unapproved.
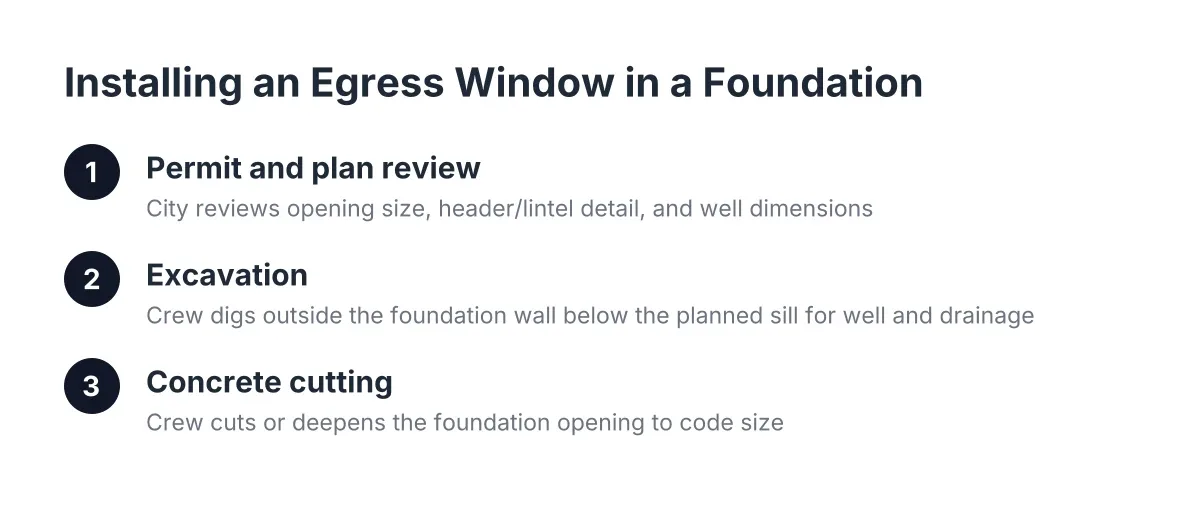
For a typical Minneapolis basement finishing project in 2026, the sequence runs like this: permits and plans, moisture and drainage fixes, any egress window work if a bedroom is planned, framing, rough plumbing and electrical, rough-in inspections, insulation and air sealing, an insulation inspection where required, then drywall, taping, paint, basement flooring, trim, and fixtures. The city signs off at set points, and drywall cannot legally cover wiring or plumbing that has not passed rough-in. If you are the type who worries about failing inspection after paying for a remodel, that sequence is your protection; the inspector sees everything before it disappears behind board.
Suppose a homeowner in Minneapolis is turning half of an unfinished basement into a guest suite for an aging parent. In that scenario, the moisture testing and exterior drainage fixes might take the first week or two, framing and rough-ins another two to three weeks with inspections in between, and drywall, finishing, and flooring the final three to four weeks. A straightforward project of that scope often lands in the range of two to three months from permit to final inspection, though timelines are estimates and vary with scope, inspections, and material lead times.
The payoff is worth the patience. Homeowners gave basement finishing a joy score of 9.5 out of 10 in the NAR Remodeling Impact Report, according to the National Association of Realtors, and the same report found 64% of basement finishing costs recovered at sale, among the highest of 20 projects studied. A dry, code-passed basement also removes the exact problem that trips up sellers: a finished space an inspector or appraiser cannot count.
Living With the Finished Space: Furniture and Long-Term Moisture Habits
Moisture planning does not end when the drywall is painted. A few habits protect the finished space for the long haul, and they cost little.
Keep furniture a few inches off exterior walls so air circulates behind it; a bookcase pressed tight to a below-grade wall creates a cold, still pocket where condensation can form. When you are weighing basement furniture ideas, favor pieces on legs over skirted pieces that sit flat on the floor, since airflow underneath keeps carpet and flooring drier. Run a dehumidifier through the humid months, aim for indoor humidity around 50 percent or below in summer, and check the base trim each spring for any staining that hints at water arriving where it should not.
None of this is complicated, but all of it depends on decisions made before the first sheet of drywall went up. Get the moisture testing, the wall assembly, and the spacing details right, and the drywall becomes what it should be: a finish surface you never think about again. Get them wrong, and the drywall is the first thing to tell you, usually with a stain, a smell, or a soft spot at the baseboard. If any part of your basement shows active water, bring in a professional to diagnose it before finishing work starts; that one decision protects everything you spend after it.
If you need basement finishing, Minneapolis Basement Finishing Pros can help.
Prefer to talk it through? Call (651) 758-8806 — a quick call is usually the fastest way to get a straight answer for your situation.